What is people counting with deep learning?
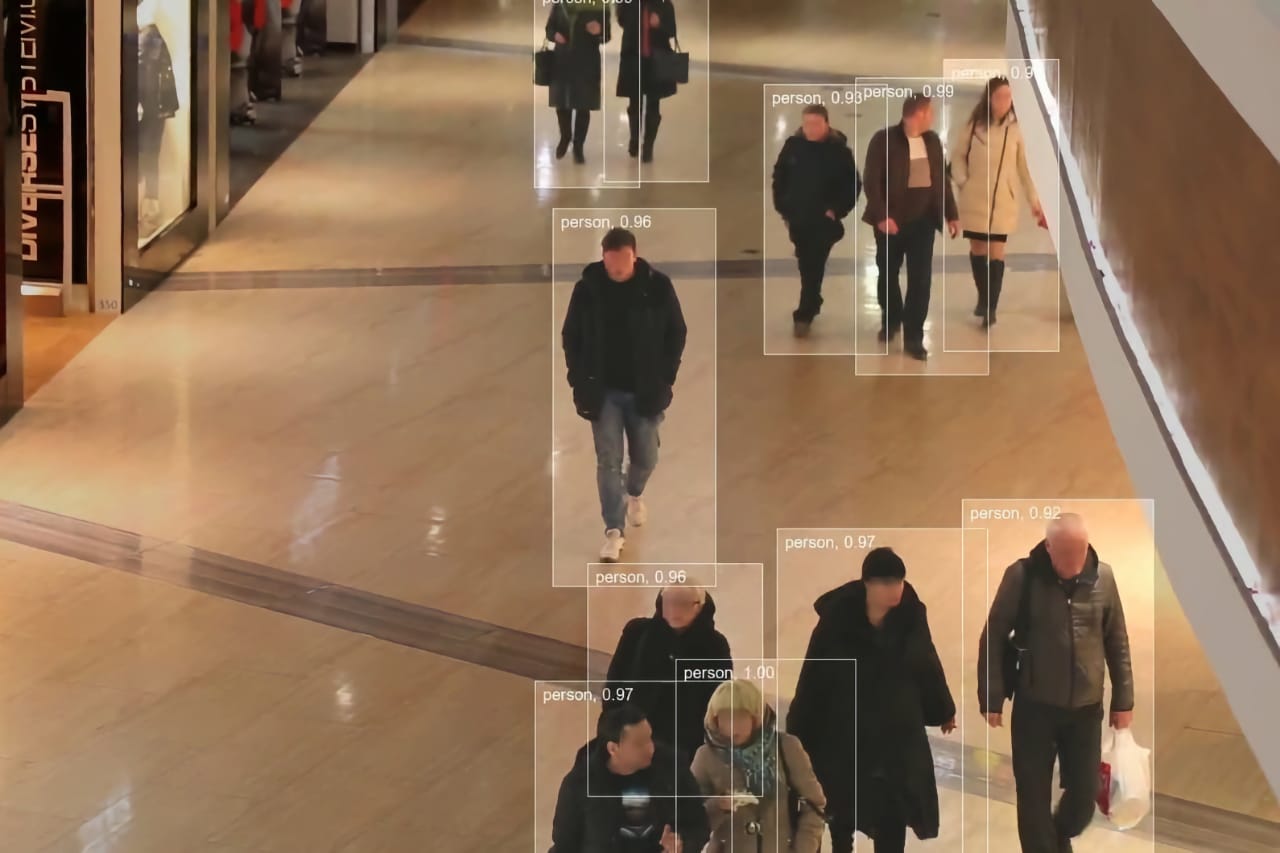
People counting with computer vision uses deep learning algorithms to detect and track individual people in the real-time video of common, inexpensive surveillance cameras. Novel deep learning algorithms provide high accuracy in both indoor and outdoor scenes.
Automatic people detection and counting in real-time video streams are important in intelligent video surveillance. Hence, automated people counting with cameras is a key application in smart cities. It also helps businesses to analyze customer traffic in indoor and outdoor scenes.
Counting of people in stores has recently gained popularity due to COVID-19 measures to prevent the spreading of the coronavirus. Another popular use case is the counting of queuing people.
Key features of people counting
Computer Vision using surveillance cameras is a highly scalable approach to accurately and consistently count people across a high number of locations.
- People detection with deep learning models to detect humans and their trajectory.
- Define regions of interest within the camera image to focus the people detector (exits, entrances, queuing areas).
- High-performance with deep neural networks to count people in complex, crowded spaces.
- Edge Computer Vision allows on-device machine learning with local image processing to guarantee privacy.
Value of vision-based people counting
Deep learning based footfall counting systems achieve high accuracy with minimal hardware requirements.
- Automatic and contactless people counting without the need for physical tracking devices, costly installation, and maintenance.
- Common surveillance cameras can be used for people counting, making the method comparably easy to implement, even in large-scale use cases.
- Increased safety of customers and workforce by ensuring compliance with government regulations, for example, related to COVID-19 measures.
- Actionable insights to estimate the number of people in retail stores in real-time, discover peak hours, bottlenecks and compare key metrics across different locations.
- Leverage insights by sending data to third-party systems and visualizing it in dashboards.