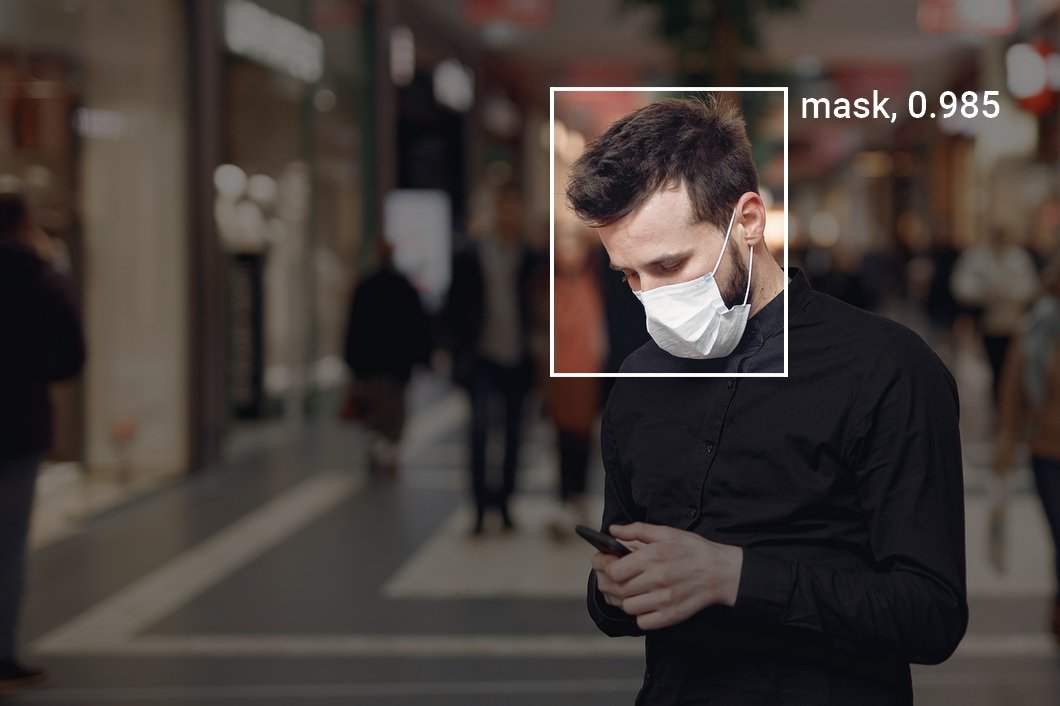
This article will guide you through the process of developing a mask detection application with deep learning. With the computer vision platform Viso Suite, you can develop a production-ready image recognition application without writing code from scratch.
Building with Viso saves a lot of expensive time and ensures future-proof compatibility across platforms (cameras, processing hardware, AI models). It provides a reliable way to develop computer vision projects with enterprise-grade security layers in place.
Requirements
- You need a Viso Workspace that provides all the tools and capabilities in one place.
- Optional: USB or IP camera, edge computer that can be a generic Intel device (x86-64 platform, desktop, embedded)
Planning Phase
Log in to the Viso Workspace, and navigate to “Library” and “Applications.” This is the place where you can manage and edit all your computer vision applications and versions. Here, you also see “Modules” currently installed in your workspace. Install new modules to add new extensions and functionality to the Viso Builder, the visual modeling tool of Viso Suite. You can add modules from the marketplace or import your custom code as Docker containers.
To build a mask detection application, we start with the design of the computer vision application. Therefore, we need to understand the application flow and ensure the required modules are installed in the workspace.
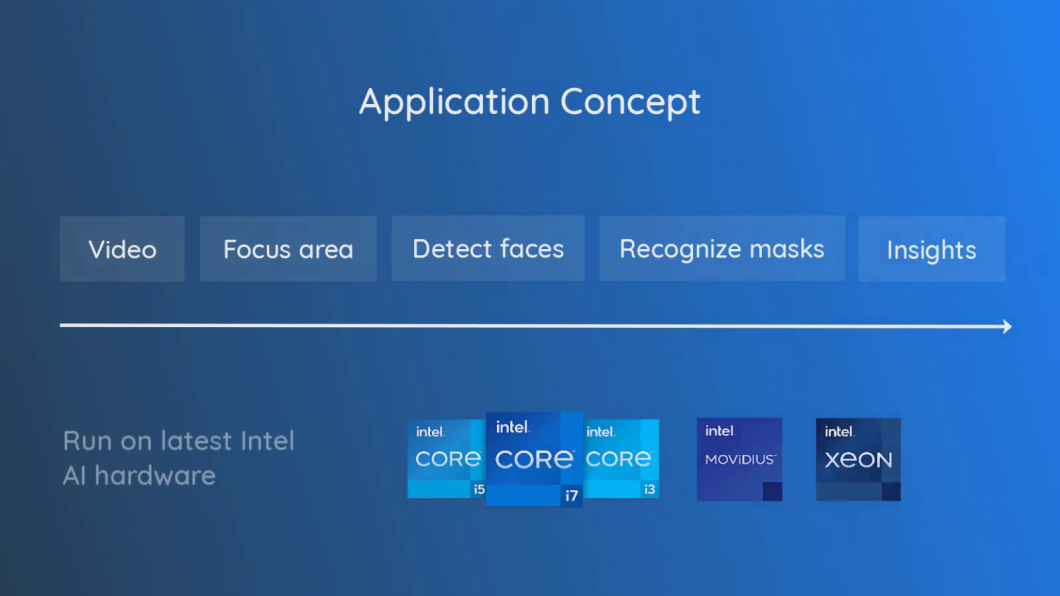
The concept of the video recognition application is very intuitive. Viso Suite allows using a visual modeling tool to easily build the computer vision pipeline – without writing code from scratch. This saves time, avoids bugs, and makes it easy to follow best practices.
Video-Input
This module grabs the video frames that provide the visual input image for the computer vision engine. With Viso, you can seamlessly switch between a video file and any digital video camera.
Focus area
The region-of-interest module is used to focus on a specific area within the video frames. For example, it is common to perform mask detection at the entrance of a shopping center or retail store. By focusing on the entrance area, the subsequent image recognition algorithms only apply to this region of interest. This usually leads to substantial improvements in computer vision accuracy and performance by reducing the workload significantly.
Face Detection
Many computer vision applications involve and combine multiple different computer vision tasks that each require specialized AI models. The concept of a flow with multiple stages is also called a computer vision pipeline.
The first computer vision module detects all faces in the focus area before the subsequent module starts detecting face masks for every detected face. Technically, face detection is the fundamental computer vision task called object detection, to recognize and localize an object (here: human faces) in an image (here: in the focus area).
With Viso Suite, you can select different AI frameworks (TensorFlow, OpenVINO, etc.) and a broad list of AI models to perform this task. Viso manages the integration, compatibility, and orchestration of the Machine Learning (ML) model serving containers automatically. The ability to easily change and update the AI model is critical because technology advances rapidly (see our article on real-time Object Detection). The list of available, pre-trained AI models is very extensive; you can manage them in your workspace (Library -> AI models) and add your own.
Mask Recognition
The following module in the pipeline will be a computer vision module for image recognition. The output of the face detector is fed into this deep learning model (face mask detection model) to recognize the presence of a mask. Hence, the output is either “mask” or “no-mask” for each face, expressed with a level of probability (e.g., 0.98 – indicating 98% probability).
Select “Create a new application” and start with a new application from scratch. Set a unique new application name. In our case, we name it “Mask Detection” and click “confirm” to proceed. The application is automatically initialized, and the editor will show an empty canvas.
Output Logic
The output data stream of a computer vision deep learning model is usually not useful without processing and aggregation. In simple terms, it would constantly send the message “person: mask, person: mask, person: mask” every time the ML model is processing an image, which could be even higher than the FPS of a video (depending on the performance and configuration).
To aggregate and make sense, a counting logic or aggregation logic needs to be applied before the data can be safely sent to third-party systems or the computer vision dashboards within Viso Suite.
Build the Computer Vision Application
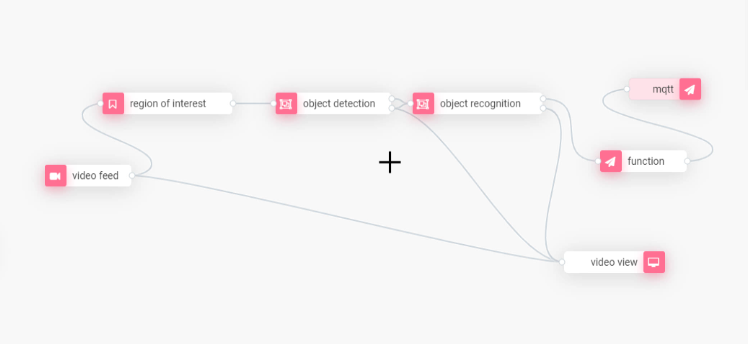
To create the real-time face mask detector, we drag the following modules from the Viso Builder side panel to the canvas: Video feed, video view, region of interest, object detection, object recognition, function, and MQTT. Wire the modules together as below:
Configure the Application Modules
For the Video Feed Module, select “video file” as the image source. Later, you can change the input to a network/IP camera (most security cameras) or USB (webcams, etc.).
In the object detection module, select the OpenVINO framework. You see the available hardware that will be used to process the visuals. Needless to say, only select hardware that is available for your computing devices.
You can select CPU for the AI inferencing task, but also VPU (Vision Processing Unit, Myriad X), iGPU (the new Intel Xe GPU series), and others. In the tutorial, we use the Intel Myriad Vision Processing Units, powerful and cost-efficient AI accelerators to process AI workloads with neural networks effectively.
It’s important to note that the hardware’s processing power significantly impacts the application’s performance (computed FPS, frames per second). CPUs are usually the easiest available but least powerful method. Nvidia or the new Intel GPUs provide the most computing power, but are relatively expensive and have a high energy usage. VPUs such as Myriad X provide very good power- and cost-efficiency ($/FPS and Watt/FPS). Just like GPUs, they can be used in combination to increase image processing performance. In our tutorial, we use four Myriad X processors.
For the model selection, we use the pre-trained face detection model of “OpenVINO for Retail.” As mentioned before, you could use your custom AI pre-trained model. However, for many standardized settings, pre-trained ML models provide good results.
Next, we select which trained object class we want the model to detect. The object detection class depends on what the neural network has been trained for. As we have already selected the Retail Face Detection model, we now select the class “Face.”
In the object recognition module, we select the Keras Framework to run on the CPU. We select the ML model “Mask Detection” to be applied.
Next, we configure the video view node. This module displays the processed video output. It’s important to note that this module may be removed in a production application because the computer vision system works fully autonomously.
Usually, costs can be saved if resources are dedicated to better application performance instead of processing a visual output video stream. In the tutorial, we set “/video” as the local URL to preview the output directly in the browser, given that the client is within the same network as the computing device.
Then, we configure the function node. We use this module to define the logic that is used to process the output data of the computer vision pipeline. The logic is especially important if multiple regions of interest are used. The easiest is to set the logic with a short JavaScript code snippet to convert the output into the desired data format depending on how the information will be used.
Finally, we configure the MQTT out node to send the information about if people are wearing masks or not via the built-in MQTT broker of Viso Suite. We define the “Topic” to which the endpoint will subscribe. This will be important to use the time-series data, for example, in dashboard widgets. The data can be seamlessly used within the dashboard builder of Viso Suite to create custom real-time dashboards with numerous chart widgets.
Deploy the Application
After the application modules have been configured, we save the app as an initial version. It will be created in the workspace library, under applications. The dependencies of the modules and the AI models they use are automatically managed; you can view them in the module or AI model sections of the workspace library.
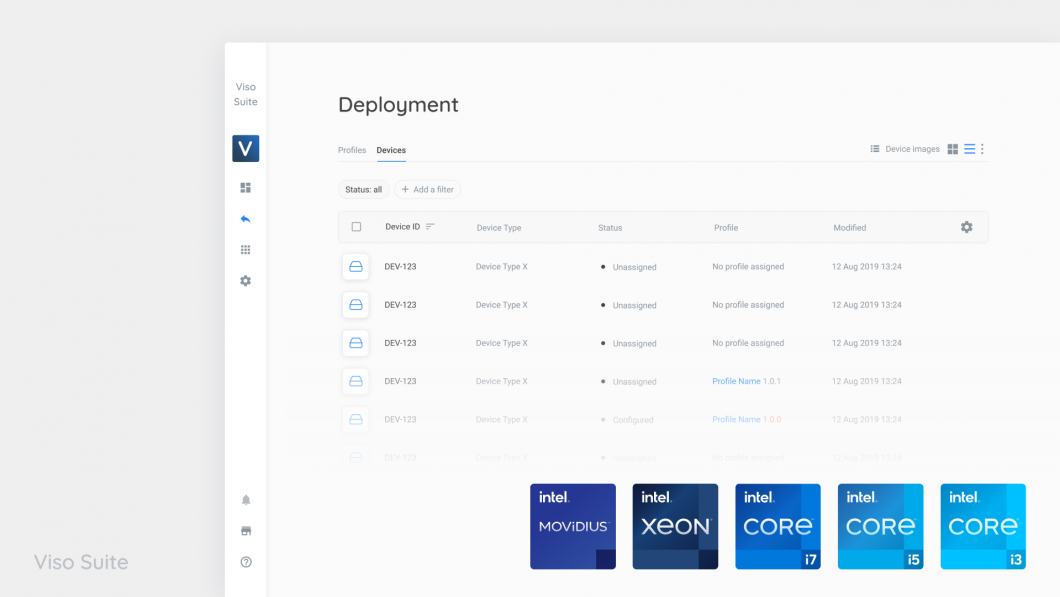
To deploy the application, add it to a profile. We assign that profile to a device that has been enrolled in the workspace. Once the device is online and available, the Viso Solution Manager will automatically deploy the application with all dependencies to the computing device.
Configure the Deployed Application
We have not yet set the region of interest to focus the mask detection on a specific area of the video/camera feed. This is only possible after the application is deployed because it is a configuration on the local level. After the application is deployed and running, we navigate to the device in Viso Suite (Deployment -> Devices) and access the Local configuration. We see all the deployed modules that are part of the running application and select the “region of interest” module.
After the cloud service requests an image frame, we can draw the region of interest (ROI) using the polygon shape. After defining the area in which the mask detection should be performed, we are prompted to set its name. We click “Save” to confirm the local configuration.
Previewing the Results
Since we have the output video module deployed as part of the application, we can now visualize the output of the computer vision pipeline. Because we set the output source as “localhost,” we can view it directly from within the browser. The output view node could be used to monitor the results from multiple input (multiple cameras) and output (parallel application paths) image sources. In our tutorial, we used one input feed (video file). Therefore, we have a result output stream available.
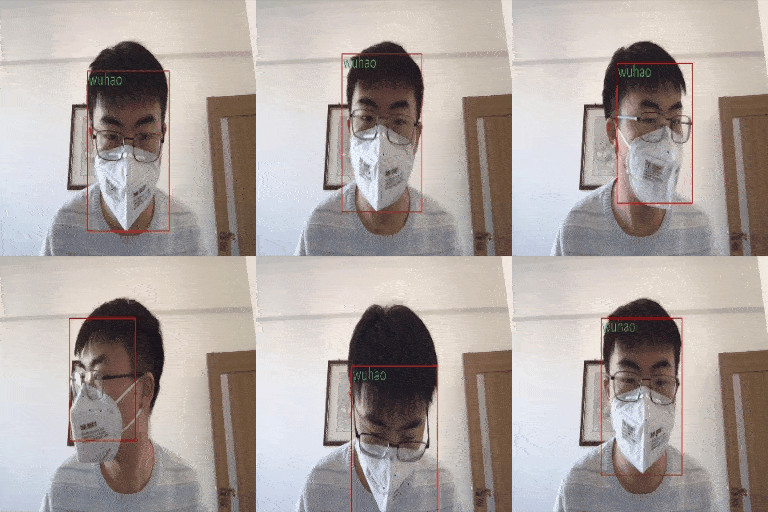
The results show how only faces within the region of interest (ROI) are detected. For each detected face, the computer vision app returns a value “mask” or “no mask,” which is updated in real-time if a person is putting on or taking off a mask.
Flexibility and Agility
The application can now be easily updated and maintained using the Viso Builder. For example, we can switch the entire processing hardware platform to GPU – without rewriting the code of the application. For instance, Viso Suite makes it easy to use the just-released Intel iGPU, which boosts performance and efficiency, resulting in significant economic cost savings for large-scale production systems.
We can switch from a video file to a webcam that we can plug into the device or use the video feed of any network security camera. It’s easily possible to use multiple video inputs or increase the complexity of the application logic. And, importantly, we can easily migrate and roll out the application to new hardware devices.
The enterprise-grade versioning system and dependency management of Viso Suite allow for the safe rollout of new applications to a fleet of devices. The built-in device fleet management ensures end-to-end security and scalability. If needed, we can roll out new versions in batches and easily roll them back to prior application versions.
Privacy
We believe privacy and security are the most critical aspects of computer vision. Computer vision often involves sensitive data, including images of people (employees, customers) or intellectual property (machines, processes, etc.). Industry leaders use the Viso Suite in healthcare, manufacturing, retail, government/public services, and other industries requiring the highest data privacy levels.
Because connecting separate tools is vulnerable to severe security and privacy issues, Viso Suite provides end-to-end capabilities to manage and protect the entire process. This is why we need to fully manage the devices, ML model deployment, inference pipelines, access management, and encryption in one place.
All visual data is processed locally, with on-device machine learning (Edge AI). This is not only much more performance and cost-efficient, but it also ensures that no video images are sent to the cloud. We can process the images in real-time, without even storing them on-device. In our tutorial app, we included an output video preview that can only be accessed on a local level. We can always deploy the application without the module and even remove the local preview entirely.
The output data is text strings “mask”/”no-mask” without sensitive visual data. This edge intelligence moves AI capabilities from the cloud to the edge device instead of moving all data to the cloud before processing it there, enabling private deep learning applications.
Get Started
Learn more about developing computer vision systems with Viso Suite. Get in touch with our team and see how you can deliver enterprise AI vision rapidly, securely, and future-proof.
